Brent has been chasing me to get whatever I can to him so he can finish off as much of the mechanical build as possible.
When the Ali batt boxes were made the top lips of the boxes that would allow the lids to be bolted on were folded in and not welded in the corners, Brent had asked us to get them welded as the boxes were supposed to be hermetically sealed according to Steve
After we had the corners of the Ali boxes welded up I took them home and spent an evening cleaning them up as they were made from reclaimed Ali and looked a little crusty to say the least.
After delivering them back to Brent, he got busy drilling the holes for the power cables, spraying the boxes silver and packing the batteries with 3mm rigid PVC foam board.
By coincidence I had that day off work and got busy with trying to complete the charger, drilled all the required holes in the heat sink, mounted everything (temporarily) so that I could wire up all the HV cables, ran out of ring spade crimps so ordered another pack, they come in 6’s I had bought 12 and used them all! Another 6 should be enough to finish the HV side.
Valery from EMW had replied to my questioning regarding how to wire the HV side on a Non-PFC single phase 240V version of the charger and this has allowed me to get stuck in with the heat sink layout and HV wire up.
Just the low voltage wiring to do, final heat sink mounting, and charger box drilling to do and then it should be on to testing.
Once I had the layout finalized I dropped the charger down to Brent for a looksee as he wanted to know where to put the bolt holes in the bottom of the charger box for mounting into the car, Brent marked the box and I left the Ali box with him to drill and fit into the car.
By another coincidence when I got there he had just finished the battery stuffing bar the last battery! So I got to slide the last LIPO into the 3rd box, it slid home like a well machined piston! Brent is a bit of a perfectionist which is great
Brent fitted the lid whilst I waffled about the charger and the Vacuum pump I had just secured from eBay for £35, it was from a Volvo and is required to vacuum assist the brakes, a vacuum would normally have been supplied by the engine (or a mechanical vacuum pump fitted on the engine anyhow) but luckily many cars need extra electric vacuum assistance as their engines cannot provide sufficient vacuum.
By the time I had finished waffling Brent had the last Batt box fitted in the car and I suggested we pushed it back and forth to get a feel for the weight, Shit this thing is seriously light, I mean feather light, I could easily push the whole car back and forth on my own whilst standing and steering from the driver’s side, we even tried it in 4th gear and the extra drag of the gears was hardly noticeable, I was still able to push the car around by myself!
A discussion ensued between me Brent and Luke concerning upgrading the brakes as a likely requirement.
So I left Brent with (a fat EV grin on my face and) just the Vacuum unit and charger box to fit, that is it, the mechanical side of things is done!
Steve gets back to work on the 30th/31st of July and has promised to get straight down to making the buss bars for the batt boxes and wiring up all of the batteries, once this is done it is just the internal wire up to do, fitting the LVC/HVC cut-off boards, dashboard charge/readout LCD meters etc, connecting it all together electrically (Soliton Jr to Motor/ charger to Batt Pack & BMS boards to Soliton Jr) and the 12V electrics to do (this will need a few more LIPO’s I think to replace what would normally be a lead acid battery)
I asked Brent to get me the bill and when I told him what I had left in my budget he flinched (not good). Oh well let’s hope I am not crying when he finally gives me the lowdown, I have not paid him a penny since he started fitting the motor/gearbox, I am guessing the damage is somewhere between 3 ½ days to 5 days full pay for him Plus a few materials, Metal, Rigid PVC, paint, under-seal etc. I had already paid for the strip down separately.
After that I am hoping I may be ready for an MOT, Let’s hope it passes.
Monday, 5 August 2013
Tuesday, 16 July 2013
Charger build picks up the pace!
Now that I have a definite deadline for completion of this EV it has become critical to speed up the charger build.
I spent some time this weekend wiring things up, Mainly crimping the HV cables and cutting down the massive heat sink slightly so that it will fit the Ali charger box I had made, It is as large as I could make it to fit the mini boot of the Honda Beat.
I have changed the planned internal layout (of the charger) several times in the course of the charger build, I think I have now settled on a workable internal layout.
I also 3D printed another toroidal ABS custom bracket now that I have a better idea of how this might work, It is basically a plastic ring the same size as the toroidal inductor with 3 (was 2) oblong rods fixed to the bottom of the ring and spaced exactly to slot into the fins of the heat sink, The length of the rods is exactly the size of the internal dimensions of the Ali charger box (front to back) so that the bracket prevents the toroidal inductor moving either forward or backwards, left or right? (shit! see comment below photo)


However I have literally just realized that my original orientation of the heat sink meant that the toroidal inductor would have been held from moving up or down by the (insulated) lid of the charger box.
Since then I have reoriented the heat sink due to the position of the driver board in respect to the power board.
This close positioning is a requirement of high frequency high power electronic switching circuits, according to a comment I read somewhere, not sure if it was on the DIY EV site or in the build instructions or most likely on EmotorWerks’s Charger build pages.
This now means that there is nothing other than friction holding the plastic rods into the slots (gravity and the lid did this in the previous orientation of the heat sink).
This will not do and I will have to come up with a better way of securing the 3D printed toroidal bracket to the heat sink, hmmm back to the drawing board!
Or maybe I will resort to a few high temp zip fasteners (I was going to order some to secure the toroid to the bracket anyway)
Oh yes, and I had better not forget the electrical potting silicone required to prevent vibration of the large capacitors.
(Just found some on Maplin’s Website, http://www.maplin.co.uk/silicone-adhesive-sealant-46001 £5.00 for 80ml, ouch!)
Thursday, 11 July 2013
Accepted for exhibiting at the Brighton Mini Maker Fair
In the spate of email correspondence with Steve clarifying what remains to be done I mentioned the fact that I have just been accepted for exhibiting at the Brighton Mini Maker Fair at the corn exchange on the 7th of September and they have asked me to exhibit the EV, MENTAL!
On the other hand this imposes a deadline for completion of the EV of the 7th of September, Steve recons that when he is back it should not take more than 4 days to complete the battery build (the copper buss-bars take most of that time) and another week to complete the car! A WEEK!
I am stunned, I thought there was a lot more to do I terms of electrical/electronic wiring but Steve recons as he put it “The worst parts are done really, from now on it’s like making an electric drill with a big battery”
However as I remember here are the remaining bits to do:-
Fit batteries into boxes & wire them up.
Fit wired boxes into car.
Fit Soliton Jr into car.
Fit (hopefully complete) charger into car.
Wire them all together and to the motor, with some big ass welders cable.
Wire up all the low voltage stuff, Soliton Jr to BMS to charger, etc.
Fit Vacuum pump for brakes.
Fit a small 12V “leisure” battery to support all the in car electronics, windows radio, vacuum pump for brakes, etc.
Get the EV MOT’ed.
Wish/Dream list
Get the whole outside of the car re-sprayed probably in gloss black or metallic black.
Get a funky wrap livery slapped on the side something like “Electro Beat” in fat electric blue lightning font.
Pimp, Pimp,Pimp that car, lighter alloys, hard top, gull wings Dream Dream Dreeeaam!
Get it to a race track and burn some (lots of) rubber ;-)
Batt boxes marked and locking brackets fitted
Brent gave the battery boxes back to my partner today (Friday 28th) with markings for where he wanted the brackets (90 degree angle Iron Ali) TIG welded in place and in the same day she had them delivered back to David @ Sussex Iron works for welding.
By Wednesday 3rd July we had the boxes back to Brent with brackets fitted, unfortunately not in time to see that Brent had jumped on a plane for his summer holiday! Bummer.
So once again I take stock and carry on with the charger build.
Sent several emails to Steve updating him on progress and found out that Steve also goes on his holiday the week Brent comes back! And he won’t be back until the beginning of August typical, Oh well I suppose it will give me more time to complete the charger build, Just wiring, bolting everything to the massive heat sink, fitting it all in the Ali box & testing (which I can’t do without the batteries fitted) sounds like a lot of work when I write it down, better get busy as I have been enjoying the rare sunshine/heat wave we are currently experiencing here in the UK and the charger build has slipped slightly, I have however been ordering/sourcing bits to finish it off with.


Batt box steel frame complete
On Thursday 27th Brent completed the battery box steel frame in the car and my partner took loads of photos (coming soon)


 He has also cleaned the car (I think this bit was done on Monday 1st July), in fact that is a major understatement, I have never seen a car so shiny other than one’s in showrooms!


They even dropped out the sub frame assemblies so they could clean properly in between them, this was all so that they could paint everything properly in undercoat and then under seal the whole underside of the car, man it looks good ;-) the EV grin returns!


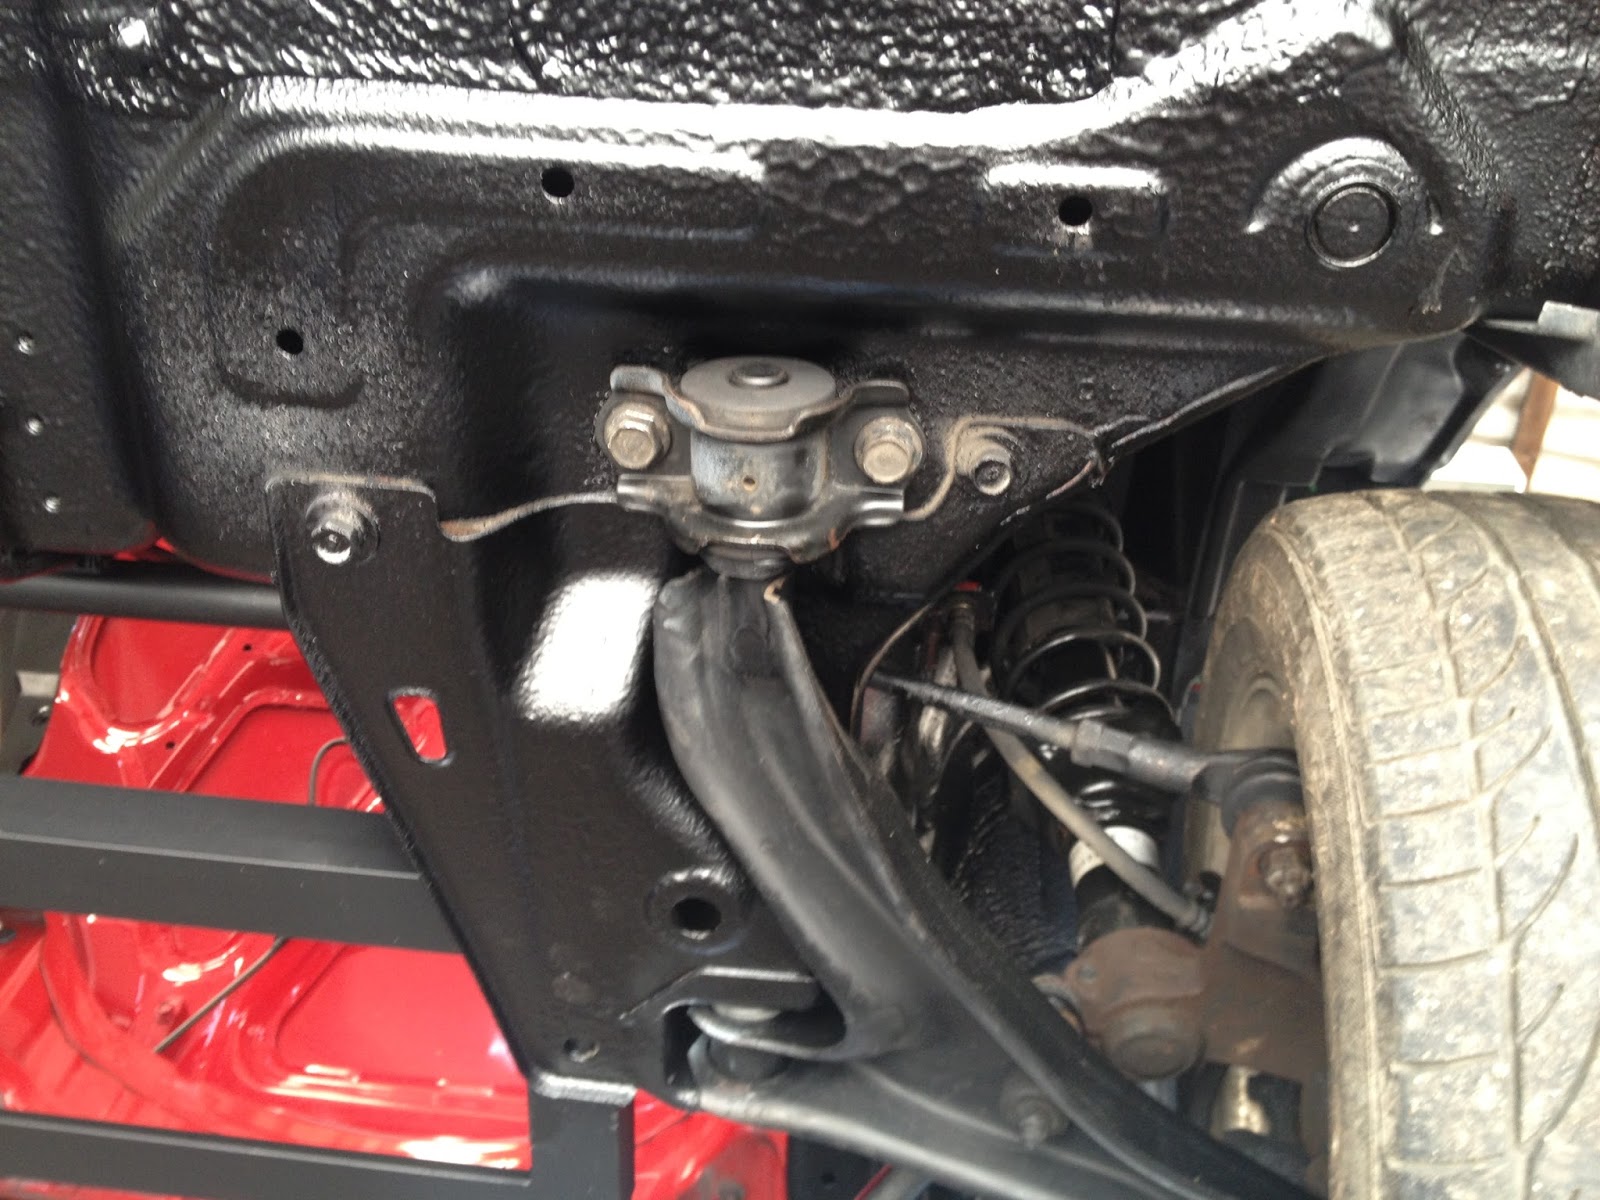


They even dropped out the sub frame assemblies so they could clean properly in between them, this was all so that they could paint everything properly in undercoat and then under seal the whole underside of the car, man it looks good ;-) the EV grin returns!
Second EV donor car bought! Are we MAD!
Yep I must really be losing it now after discussing the options for replacing our only “Working” car this weekend (16th June 2013 for my own reference).
We don't really have a choice as it is a fantastic twin turbo 2.5 liter (gas guzzling) VR4 Legnum (road eating monster!) estate and it is costing us a fortune to run now that the price of petrol has reached the ridiculous levels it’s at in the UK, but man it’s fun to drive ;-)
£1.33 Pence per liter! 4.56 liters to the gallon 1.33 x 4.56 = £6.06 per gallon or $9.52 per gallon for you US folks!
Legalized Extortion! Still at least it is seriously pushing the alternatives here in the UK.
My partner decided that she was not willing to drive a “Noddy” car (that's an underpowered “sensible” car to most people, Noddy is a children’s character who drives a plastic "toy" car) and that looks and power were still top of the agenda (did I mention we are reforming petrol heads!) however not willing to hang the ECO issue out to dry the only option as far as we can see is full blown electric, hybrids are a false economy as towing a petrol engine for extra power when required and for range extension does not make sense, and when you are running on petrol you are towing a large set of depleted batteries and motor/controller etc. Bonkers!
Hydrogen Powered cars just don't make sense either as the cost of producing the hydrogen outweighs the savings in both energy and money, LPG is a limited resource just like Petrol and Diesel, and although I realize that lithium is not great for the environment the future of battery technology is looking bright what with the graphene battery technology that is being developed currently amongst others, there is definitely a race on to find the next 21st century energy storage technology and I am looking forward to it landing sooner rather than later.
So being a sensible (MAD!) girl like she is and seeing as my 1st EV build is going so well she decided to drop a bombshell on me this weekend by buying an Mazda RX8 incredibly cheap of eBay we won the auction for £560! And the current owner has already stripped the dead engine out as he was intending to fit another gas guzzler in there, I was going to do an RX8 as my next conversion if the Honda worked out nicely, but as always the missus likes to stir it up and put the pressure on ;-)
Still she could be sensible. "Boring!"
Monday, 17 June 2013
Charger panic over
Ok so my worries over missing parts were unfounded, as it turns out the voltage doubler board is for countries that have 110V AC mains supply, obvious really but as I am a novice at HV electronics these sorts of issues are bound to trip me up.
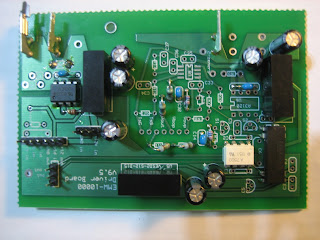
Thankfully Valery of Emotorwerks clarified the confusion as soon as I sent him a photo of my kit unpacked, there was 1 part missing however an output diode, Valery sent me a link to the part so I could confirm that the part was definitely missing (which it was)
In fact the service I have received so far from Valery of Emotorwerks is second to none, Thanks Valery, We shall probably be doing more business in the future (when I start my second EV build, whoa there slow down boy one at a time!)
Will get more photos uploaded soon as soon as I can find the micro usb lead for my other camera.
I am really starting to enjoy this build now.


Subscribe to:
Posts (Atom)